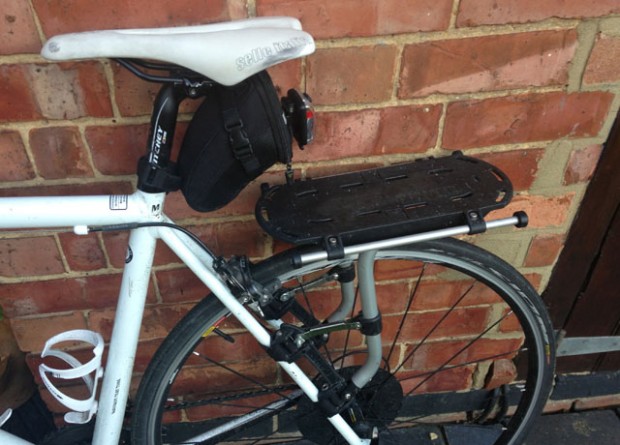
The Thule Pack’n’Pedal Tour Rack promises to solve many of the fit issues surrounding pannier racks. Thule say it can be adapted to fit on any bike, including full-suspension mountain bikes, it doesn’t need the mounting holes on a bike frame to bolt into, and that it’s easy to remove.
Does it live up to these promises? In short, yes. So long as you attach it properly, as I learned!
I’ve had several long tests with this set up. I’ve popped it on my full sus MTB, I’ve moved it to my road bike, I’ve ridden with just the rack, and I’ve cycled to work over several weeks with it fully loaded with pannier bags. I’ve had a few false starts and wobbly moments, but now I love it.
When you open the box and unpack the bits for the Pack’n’Pedal rack, you’ll find the aluminium and plastic frame and plastic top of the rack itself, a selection of 3 different lengths metal struts, and some tools. Don’t loose any of this stuff, as you’ll definitely need these in the future! I had a 2am mission turning my room upside down to find one of the little tools – not fun.
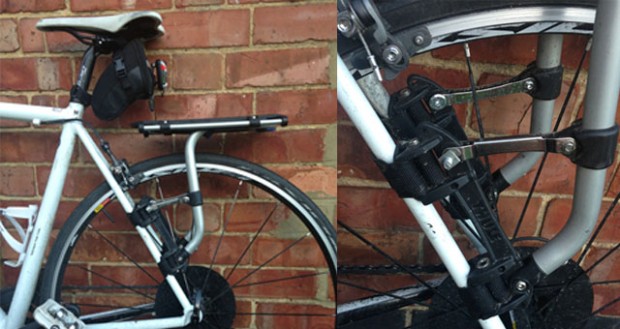
The rack fixes to the bike at the seat stays, using fabric straps that are tightened and secured by a ratchet system. You use the different lengths of strut supplied with the rack to adapt it to different bikes – for example, I used the longest strut on my MTB, and the shortest on my road bike. Choose the one that allows the top of the rack to sit parallel to the ground when it’s attached.
Installation was fairly easy – the instructions were logical to follow, and you can kind of work out what to do by looking at the rack and a picture of what it’s supposed to look like afterwards, which is my usual method but not recommended.
The slightly tricky elements included getting the rack level, and doing the straps on the seat stays up tight enough.
You can position the height of the rack by loosely fitting it to the seat stays, then sliding each side up and down until it’s level, then tightening them fully. I opted to tighten the lowest strap on each side first, making sure they were in the right position, and then doing the other straps up.
Tightening the straps enough is critical, and I didn’t do it tight enough the first few times. I know this because halfway along a route on my MTB the rack and pannier slid over to one side. I popped it back into position, tightened it up and set off again. A similar thing occurred with the rack on my road bike; en route, with it fully laden with pannier bags, it slid down the seat stays until the top of the rack was rubbing on the back wheel, a bit like a brake. I managed to wrestle it back up again. It’s worth making sure you have the 5mm Allen key with you for this purpose.
Thule say that the straps should be tightened to 15 newtons, which would require a torque wrench – something I don’t own. I was overly cautious about how much I should be tightening the straps, and hence encountered the problems above.
I subsequently tightened them as much as I could by hand, and since then I’ve had no further problems, even with a lot of gear on the back. I’d recommend making really sure they’re well done up, ideally using a torque wrench if you can get hold of one.
The rack itself isn’t the lightest, weighing in at 942grams, but since I was planning on putting some heavy bags on the back in any case this wasn’t really a problem for me. I went out for a few longer rides on the road bike with the rack but without loads, and I didn’t notice it was there at all.
Being able to move this rack between different bikes is amazing. It’s not incredibly quick to do, and little bit of a faff, but that you can do it at all is a great innovation. It’s brilliant to be able to use panniers on my road bike, which doesn’t have the usual mounting holes, so I can use it for commuting and a little touring. I’ve also got plans for some MTB touring and camping, and having a rack that I can mount on a full sus makes this easier.
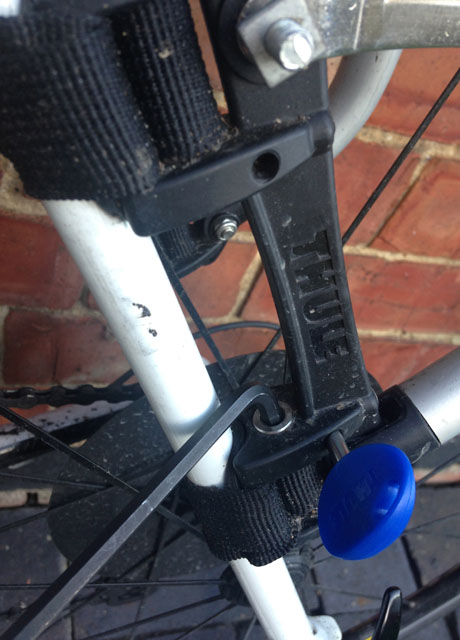
It’s worth putting down a few words on taking the rack back off again; I was stumped on this one for a while. You need both the little blue key tool and the 5mm Allen key that are supplied with the rack. The blue key needs to be pushed and held into a small hole above the catch to disengage the ratchet mechanism, and you use the Allen key to unwind the strap – see the picture to work out the right hole. It’s a bit fiddly, but once you’ve worked out it’s no problem.
On the mountain bike, I did initially catch my heel on one of the bags when pedalling. Then I realised that you can adjust the rack by pulling the rods where the bag attaches out further back – problem solved.
Another advantage of this rack is the load it can carry; 25kg on the top or 18kg on the sides. This is comparable to most bolt on racks, and a lot more than the quick-release racks that clamp onto seat posts, which usually carry in the region of 9kg.
I loaded mine with two pannier bags (which was much better for balance on the road bike!) with laptop, change of clothes, makeup and wash bag, notepad, etc. etc. and (once the straps were done up tight enough) I had no problems with weight. I didn’t notice any side-to-side motion, and the load felt very stable.
Thule also produce a ‘sport’ version that doesn’t have side rods for panniers and is lighter weight, and there’s a selection of compatible bags in the Pack’n’Pedal range, which will be reviewed soon.
VERDICT
Whether you’re commuting or planning a trip or tour, the Pack’n’Pedal rack adds versatility without compromising on weight bearing capability, stability, or robustness. Having a sturdy rack that can carry significant weight for bikes that normally can’t take one is great; having a rack that can be switched between lots of different bikes relatively easily is even better. There is a price to be paid for this, and this rack (and the complementing pannier bags) are at the premium end of the price range.
PROS
– Can fit bikes with no rack mount holes
– Can fit on full suspension MTBs and bikes with disc brakes
– Strong and stable
CONS
– Fitting (and tightening straps enough) is slightly fiddly
– Requires specific tools (supplied, and replaceable)
Price: £84.99
More info: Thule
Available from: Madison, Leisure Lakes Bikes
What Thule say about the Pack’n’Pedal Tour Rack:
Patented rack attachment system works on virtually any bicycle from full suspension mountain bikes to commuters and everything in between.