Share

Training & Nutrition

Your Definitive Guide to Power Meters

Why get one, which one to go for, and how to use it

There are a number of ways to measure your performance and training efforts on the bike – you can track your speed, use your heart rate, or if you’re really after the very best in data, you can opt for a power meter.

A power meter is a tool to make you faster and stronger unlike any other. You don’t swap cash for speed, like you would when upgrading to more aero components, or a lighter bike – you need to learn to understand your new favourite training partner so you can work together to improve and transform your riding.

We’ve put together a comprehensive guide to power meters: why they work, how you can benefit and the different types you can invest in.

Why train with power over heart rate, or speed?

Power meters measure the amount of power your pedalling produces in watts. Knowing how much power you’re creating can tell you a great deal of data:

  • You can determine if you are training in the right ‘zone’ for your given goal
  • You know when you are improving, and when you are not
  • You can pace yourself during a race very well

Training with power is more reliable than training with heart rate. This is because your heart rate is influenced by other factors, such as heat and fatigue. This could cause a problem, for example, if you were racing on a hot day – your heart rate might be much higher than normal, causing you to slow your pace for fear of going too hard at the start.

Not only that, but heart rate does not react immediately – it increases over time and drops over time. For example, when a rider sprints for 20 seconds, there will be an immediate increase in power, but this won’t show on their heart rate data.

In the same way, if you want to produce the same effort over an extended period of time (for example, a 10 mile time trial), a power meter will show you exactly how much power you are producing, whilst your heart rate will climb steadily throughout the effort.

Both methods beat training using average speed – because this is hugely affected by wind direction, strength and even air pressure.

Power meters aren’t cheap – and if they’re out of your grasp, heart rate and speed are effective – so don’t feel you can’t train well without watts.

What power meters are available?

Once upon a time, training with power was only for the elite, but that’s changing, and now brands are constantly bringing out new options to help make watts more affordable. There are a number of different positions on the bike where power can be measured:

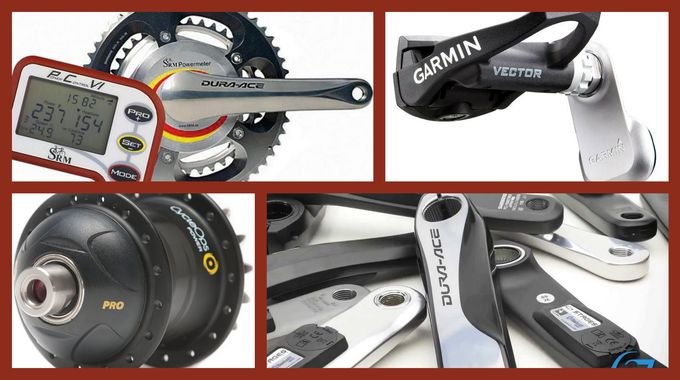
HUBS

PowerTap are the leaders for power measuring hubs. With products starting from £500, hubs and wheel-sets can climb into the thousands.

A hub based power meter is useful because you can swap the wheel between bikes if you want to. However, once the hub is built into a wheel (or bought already in a wheel) you are pretty much stuck with the wheel. If you want to train hard and race on it, you’ll need to compromise strength or performance somewhere.

CRANKS

Measuring from the cranks means it’s not that easy to swap between bikes – fine if you have one bike, but if you have a training mule and a race machine, you are left with an awkward decision.

There are a few options in crank based power meters – Quarq are a popular brand if you want the standard, double crank measuring device, but most options are close to the £1,000 mark.

Stages power meters, used by Team Sky, measure power produced by one leg, and double the figure. This has been shown to be fairly effective, but it’s worth remembering if you have one leg stronger than the other your results might be skewed. This said, as long as you are comparing the same measurement between sessions, you’re fairly safe, and the cheapest options are around £600.

Finally, Power2Max are a popular brand, they are a bit cheaper, but they come from Germany so you’ll need to wait a while.

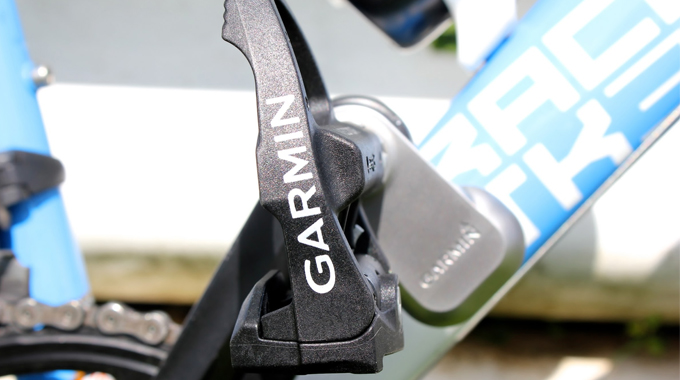
PEDALS

The other option is to measure from the , using the Garmin Vector pedals – these are easily transferable, but you do need to be very careful when fitting them. A pair is close to £1,000, but you can buy one and use the Stages method of doubling the data for around £500.

What you choose will depend upon how transferable you need your power meter to be, how important wheel choice is to you, and how much you want to spend.

How to train with power

Before you start training with power, you’ll need to set your training zones.

Power is individual, and how fast a person is will be based upon their power to weight ratio – this is the power they produce, divided by their weight. The higher the power to weight ratio, the stronger the rider, but the bottom line is to not compare your power data to that of your peers.

Task number one is to determine your ‘FTP’, or Functional Threshold Power. This is the power that you can hold for one hour. You can do this by:

  • Riding a 25 mile time trail, or riding flat out for one hour – unless this is a race, you’ll find it hard to perform at your absolute max. If you can do this, your FTP is the average power over an hour.
  • Riding a one hour criterium race, and using the ‘Normalised power’ figure as your FTP – this takes away the effect of free-wheeling, smoothing out the results
  • Completing a 20-minute threshold test. Warm up for 10 minutes, go as hard as you can for five minutes, ride 5 minutes steady, then put all your effort into one 20 minute steady effort. Record your average power for the 20 minutes, multiply it by 0.95, and that’s your FTP.

Your FTP is 100% of Threshold, and the other zones are based around it:


Zone

Description

% FTP

1 Active Recovery <55
2 Endurance 56-75
3 Tempo 76-90
4 Lactate Threshold 91-105
5 VO2max 106-120
6 Anaerobic Capacity 121-150


With these zones, you can train the areas that are most important to success in your chosen cycling goals. For example, to be a good time trialist, your Lactate Threshold needs to be strong, so you’d practice intervals at this level, and just above. A road racer who wants to contest the sprint will be all about improving their Anaerobic Capacity.

Sessions for power meters

The sorts of sessions that will suit your training depends upon your goals – here are a few examples for you to have a go at:

ACTIVE RECOVERY

Your power meter isn’t just helpful for making sure you go hard enough in your training – it is also there to make sure that when you go for easy rides, you are taking it easy. A 1-2 hour ride in Zone 1-2  will have you prepped for a good training session the following day.

ENDURANCE

A popular method of periodizing training is to rack up the ‘base miles’ in the off season, and then build speed sessions in as races draw closer. Base miles build up your endurance, and offer you the chance to think about form as you ride fairly gently. These rides  will be longer than your longest planned race, perhaps 3-4 hours.

TEMPO RIDES

This is the kind of rate that feels ‘quite hard’, but doesn’t push your body to the point it will make adaptations. This sort of ride is useful for encouraging your body to burn fat, and a 60 minute fasted ride in this zone could yield these results, but if you’re short on time, it’s not the most useful pace to ride at.

LACTATE THRESHOLD

If you’re training for time trials, or hope to break away in a road race, and stay away – this is your zone!

Training intervals in this zone are generally 12-20 minutes long – the aim is to ride just above what you could sustain in a race, to encourage your body to adapt, so eventually you can sustain it in a race.

A great session, for example, would be a 15 minute warm up, and then two twenty minute efforts, with five to ten minutes in between and a cool down at the end.

VO2 MAX

Working in zone 5, you will definitely feel the burn in your legs and lungs. These sorts of intervals can be held for three to eight minutes, and should feel very hard. Over time they’ll improve your ability to push over short durations, and the added strength will boost your FTP, too.

Sessions could include five sets of three minute intervals, with five minute recoveries, or an pyramid of three, four, five, four, three minute efforts, again with five minute recovery intervals.

Make sure you warm up and cool down after these, and have an easy ride the following day.

ANAEROBIC CAPACITY

These intervals are well under a minute long, and all about top end speed and power. If you want to win a sprint, these are for you!

Training in this zone can hurt a lot, but it can be pretty fun, too! Try going out for a spin in zone two, and then sprinting for 20 seconds every time you see a post box, red car (you will be surprised how many there are!) or other regular landmark.
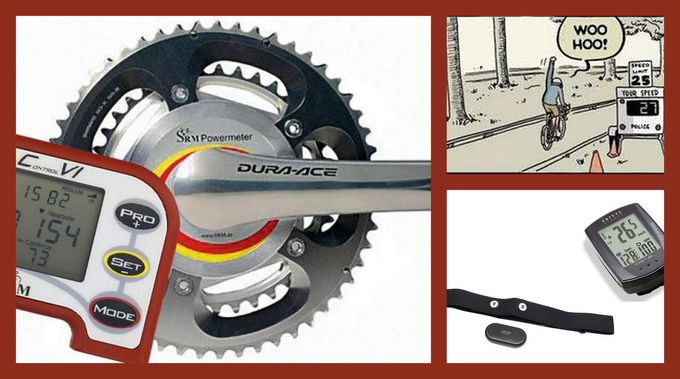
So now you’re a savvy power-meter queen, you can enter the realm of Watts with the confidence and determination to improve your performance on the bike.

Watts aren’t everything though. While they are the most effective way to train, heart rate and speed measurements are useful guides to track your progression too.

You may also enjoy:

Everything you need to know about training with heart rate

How to effectively plan your training

Newsletter Terms & Conditions

Please enter your email so we can keep you updated with news, features and the latest offers. If you are not interested you can unsubscribe at any time. We will never sell your data and you'll only get messages from us and our partners whose products and services we think you'll enjoy.

Read our full Privacy Policy as well as Terms & Conditions.

production