Share

Training & Nutrition

Riding Rollers: Beginners Tips for Indoor Cycling on Rollers

A bit of an art, but nothing a little practice won't fix...

Over winter, a lot of cyclists take to indoor training to keep their fitness up away from the gales and downpours that are so typical in Britain.

There are two popular options for indoor training: turbo trainers, and rollers. Turbo trainers simply attach to the rear wheel, and allow you to pedal it out as hard as you like. They don’t require a lot of skill but allow you to get a seriously heart pumping workout in a short space of time.

Turbo Vs Rollers Buying Guide

Turbo Sessions You Can do in Under 30 Minutes

Six Pro-Worthy Turbo Sessions 

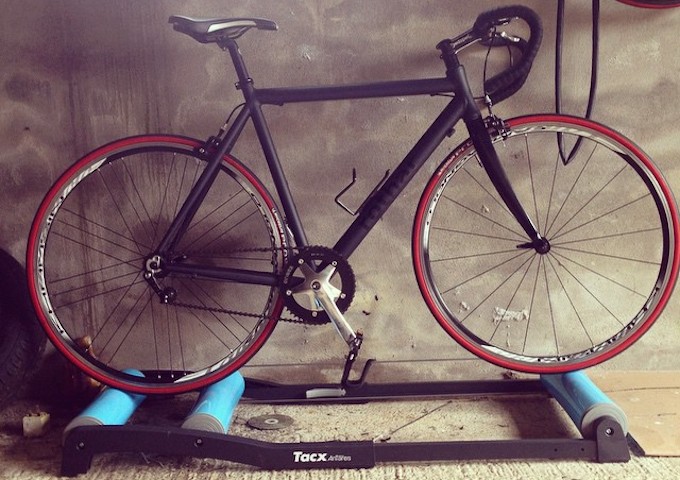
Rollers, on the other hand, do require a bit of skill. They’re made up of rotating drums, and there’s nothing but your own sense of balance keeping you attached to them. Though this can take practice, it also means that riding on the rollers is great for helping to develop your balance, core strength, and cadence as it’s near impossible to grind it out in a high gear. Not only that, they’re also quieter, lighter, and require almost no set up aside from unfolding.

I’ve always been put off attempting riding the rollers, because it’s just been easier to hop onto the turbo. However, having recently converted my interests to track cycling, I soon realised that the it was an important skill to master as most of those taking part in sessions will use the rollers between exercises on the boards.

So, I set about attempting to learn to ride the rollers last week – and it turned out it wasn’t as difficult as I’d feared! Aside from a few short lived attempts a few years ago, I’ve ridden them only four times, so I’m plenty green enough in the art to impart the sort of tips required by an absolute beginner…

One: Start next to a solid object

Once confident and used to the sensation, riders are able to hop onto rollers without external support – like so…

But we’ll make the assumption that if you’re reading this you aren’t at that level. I chose a large Ikea shelving unit, but many people opt to begin their roller journey between the two sides of a doorframe.

It’s also a good idea to set yourself up so that your stronger arm will be on the handlebar initially, with your weaker arm resting on your solid object. This will help you get your balance, and will make taking both hands on to the bars much easier.

If your rollers have a resistance setting, then turn it off or down so that you can spin more easily on your first few attempts. There’s time for heart rate raising intervals later.

Have any items you think you’ll need next to you – be that a TV remote control, radio, Garmin, or water. You’ll probably want all of those.

Two: Set your pedal up and clip in

You want to start with your pedal in a position that allows you to transfer power from the start. As you get on, hold the back brake to give yourself time to get settled (I’m using a track bike so this doesn’t apply). Then, clip in with the pedal at 3’oclock and let go of the brake as you roll down to the 6’oclock position to get your other foot in the pedal. You can keep holding on to your safe solid object at this point.

Step three: Start pedaling

Yes – it had to happen eventually. On your first few attempts, keep holding on to something to steady yourself as you begin to pedal. Try to keep your cadence fairly regular as this will keep you steady, and aim for a speed that feels natural – trying to spin too fast will cause you to wobble on the roller whilst grinding out a big gear will make you feel unbalanced.

Step four: Let go

It’s time to do it – let go of your solid object! This step really is ALL about confidence – hold your arms steady and your core strong, look forward not down and keep pedalling smoothly. This might take a few goes – try holding your hand just a few centimeters from your ‘safety’ object, then just a few inches, then wave it over the handlebar until you feel ready to make the next step.

Step five: moving around

Initially, you’ll probably want to stay on the tops or the hoods, but once you start incorporating efforts it’s likely you’ll want to move your hands around.

If you’re not confident getting into the drops whilst moving, start by going back to stage one, but instead of beginning with your hand on the top or the bars or hoods, start on the drops, then move your second hand to the bars. Eventually, you’ll find you’re confident enough to move around, take a drink and perhaps make an omelette  on the go, but this might take a while!

Step six: Stopping

It would be cruel to tell you how to start, and not how to stop! This is a case of gradually slowing down, holding your arm out for your solid object, and then squeezing the back break once you’re confident you have a firm grasp. Try not to let the front wheel slide as you unclip as this can cause an ‘off the side’ moment.

Here it is in motion…


After sessions for the rollers? Once practiced you can still ride intervals on the rollers as you would a turbo trainer, but it may be best to opt for steadier efforts as opposed to one minute sprint varieties. Check out some options below: 

Turbo Sessions You Can do in Under 30 Minutes

Six Pro-Worthy Turbo Sessions

Newsletter Terms & Conditions

Please enter your email so we can keep you updated with news, features and the latest offers. If you are not interested you can unsubscribe at any time. We will never sell your data and you'll only get messages from us and our partners whose products and services we think you'll enjoy.

Read our full Privacy Policy as well as Terms & Conditions.

production